ADnull uses the Private DNS feature (DNS over TLS) built into Android. No additional apps required — ad and tracker blocking works at the system level across all your apps. Supported on Android 9 and later.
Requirements
-
Android 9 (Pie) or newer
-
An active ADnull subscription
-
Your personal DNS domain — find it in the Settings tab of your ADnull account
Your Personal DNS Domain
Every ADnull user gets a unique DNS domain in the format: your-identifier.dns.adnull.com
You can find it in your ADnull account under the Settings tab → "My DNS Domain" field.
Setup
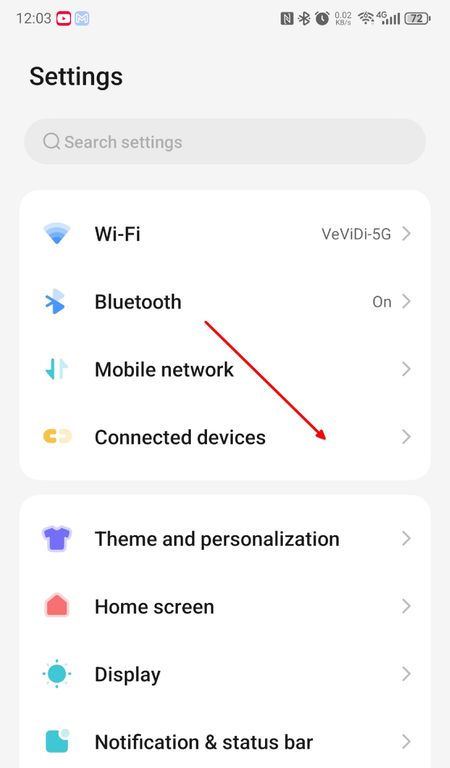
Step 1. Open your phone's Settings
Open Settings and navigate to "Connected devices" or "Network & internet".
On Samsung, Xiaomi, and other devices this section may be called "Connections" or "Wi-Fi & network".
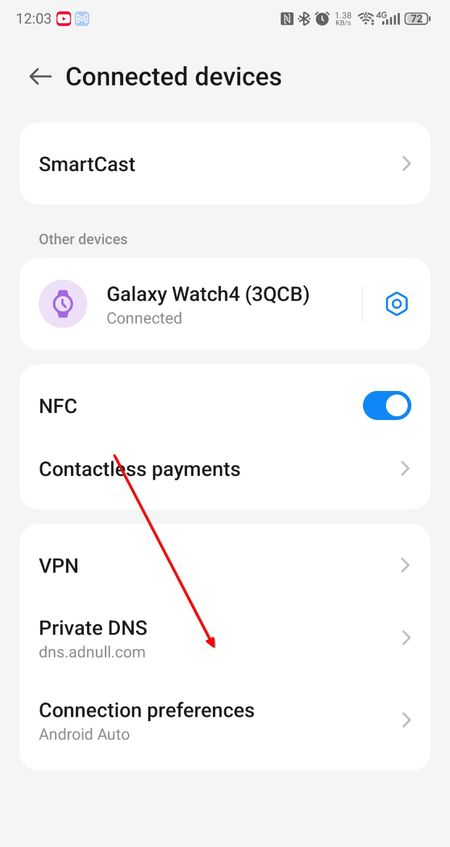
Step 2. Find Private DNS
Inside the network settings, locate and tap "Private DNS".
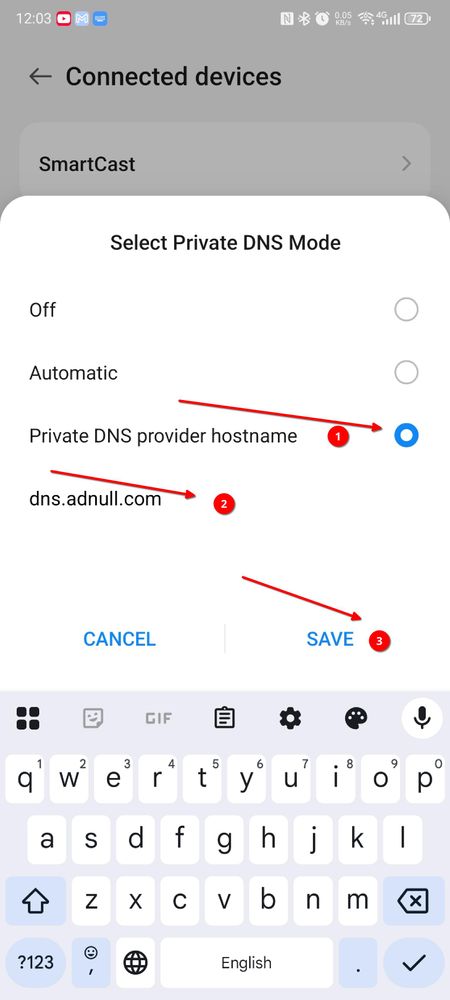
Step 3. Enter your personal DNS domain
-
Select "Private DNS provider hostname"
-
Enter your personal DNS domain from the Settings page:
your-identifier.dns.adnull.com
- Tap "Save"
Verification
After saving:
-
You should see a "Connected" status next to Private DNS
-
Return to your ADnull account and tap "Check DNS connection" — this confirms the configuration was set up correctly
Troubleshooting
Status shows "Couldn't connect"
Check that your ADnull subscription is active and you have internet access
Can't find Private DNS
Verify your Android version is 9 or higher. Try using the search in Settings
Ads are still appearing
Restart your device after saving the settings
Security: If you suspect someone is using your DNS domain without authorization — generate a new one in your ADnull account under Settings. All devices using the old domain will lose the benefits of paid subscriptions.
Note: Private DNS does not work while a VPN is active. If you use a VPN, refer to your VPN provider's documentation for setting a custom DNS.